The Starship Enterprise
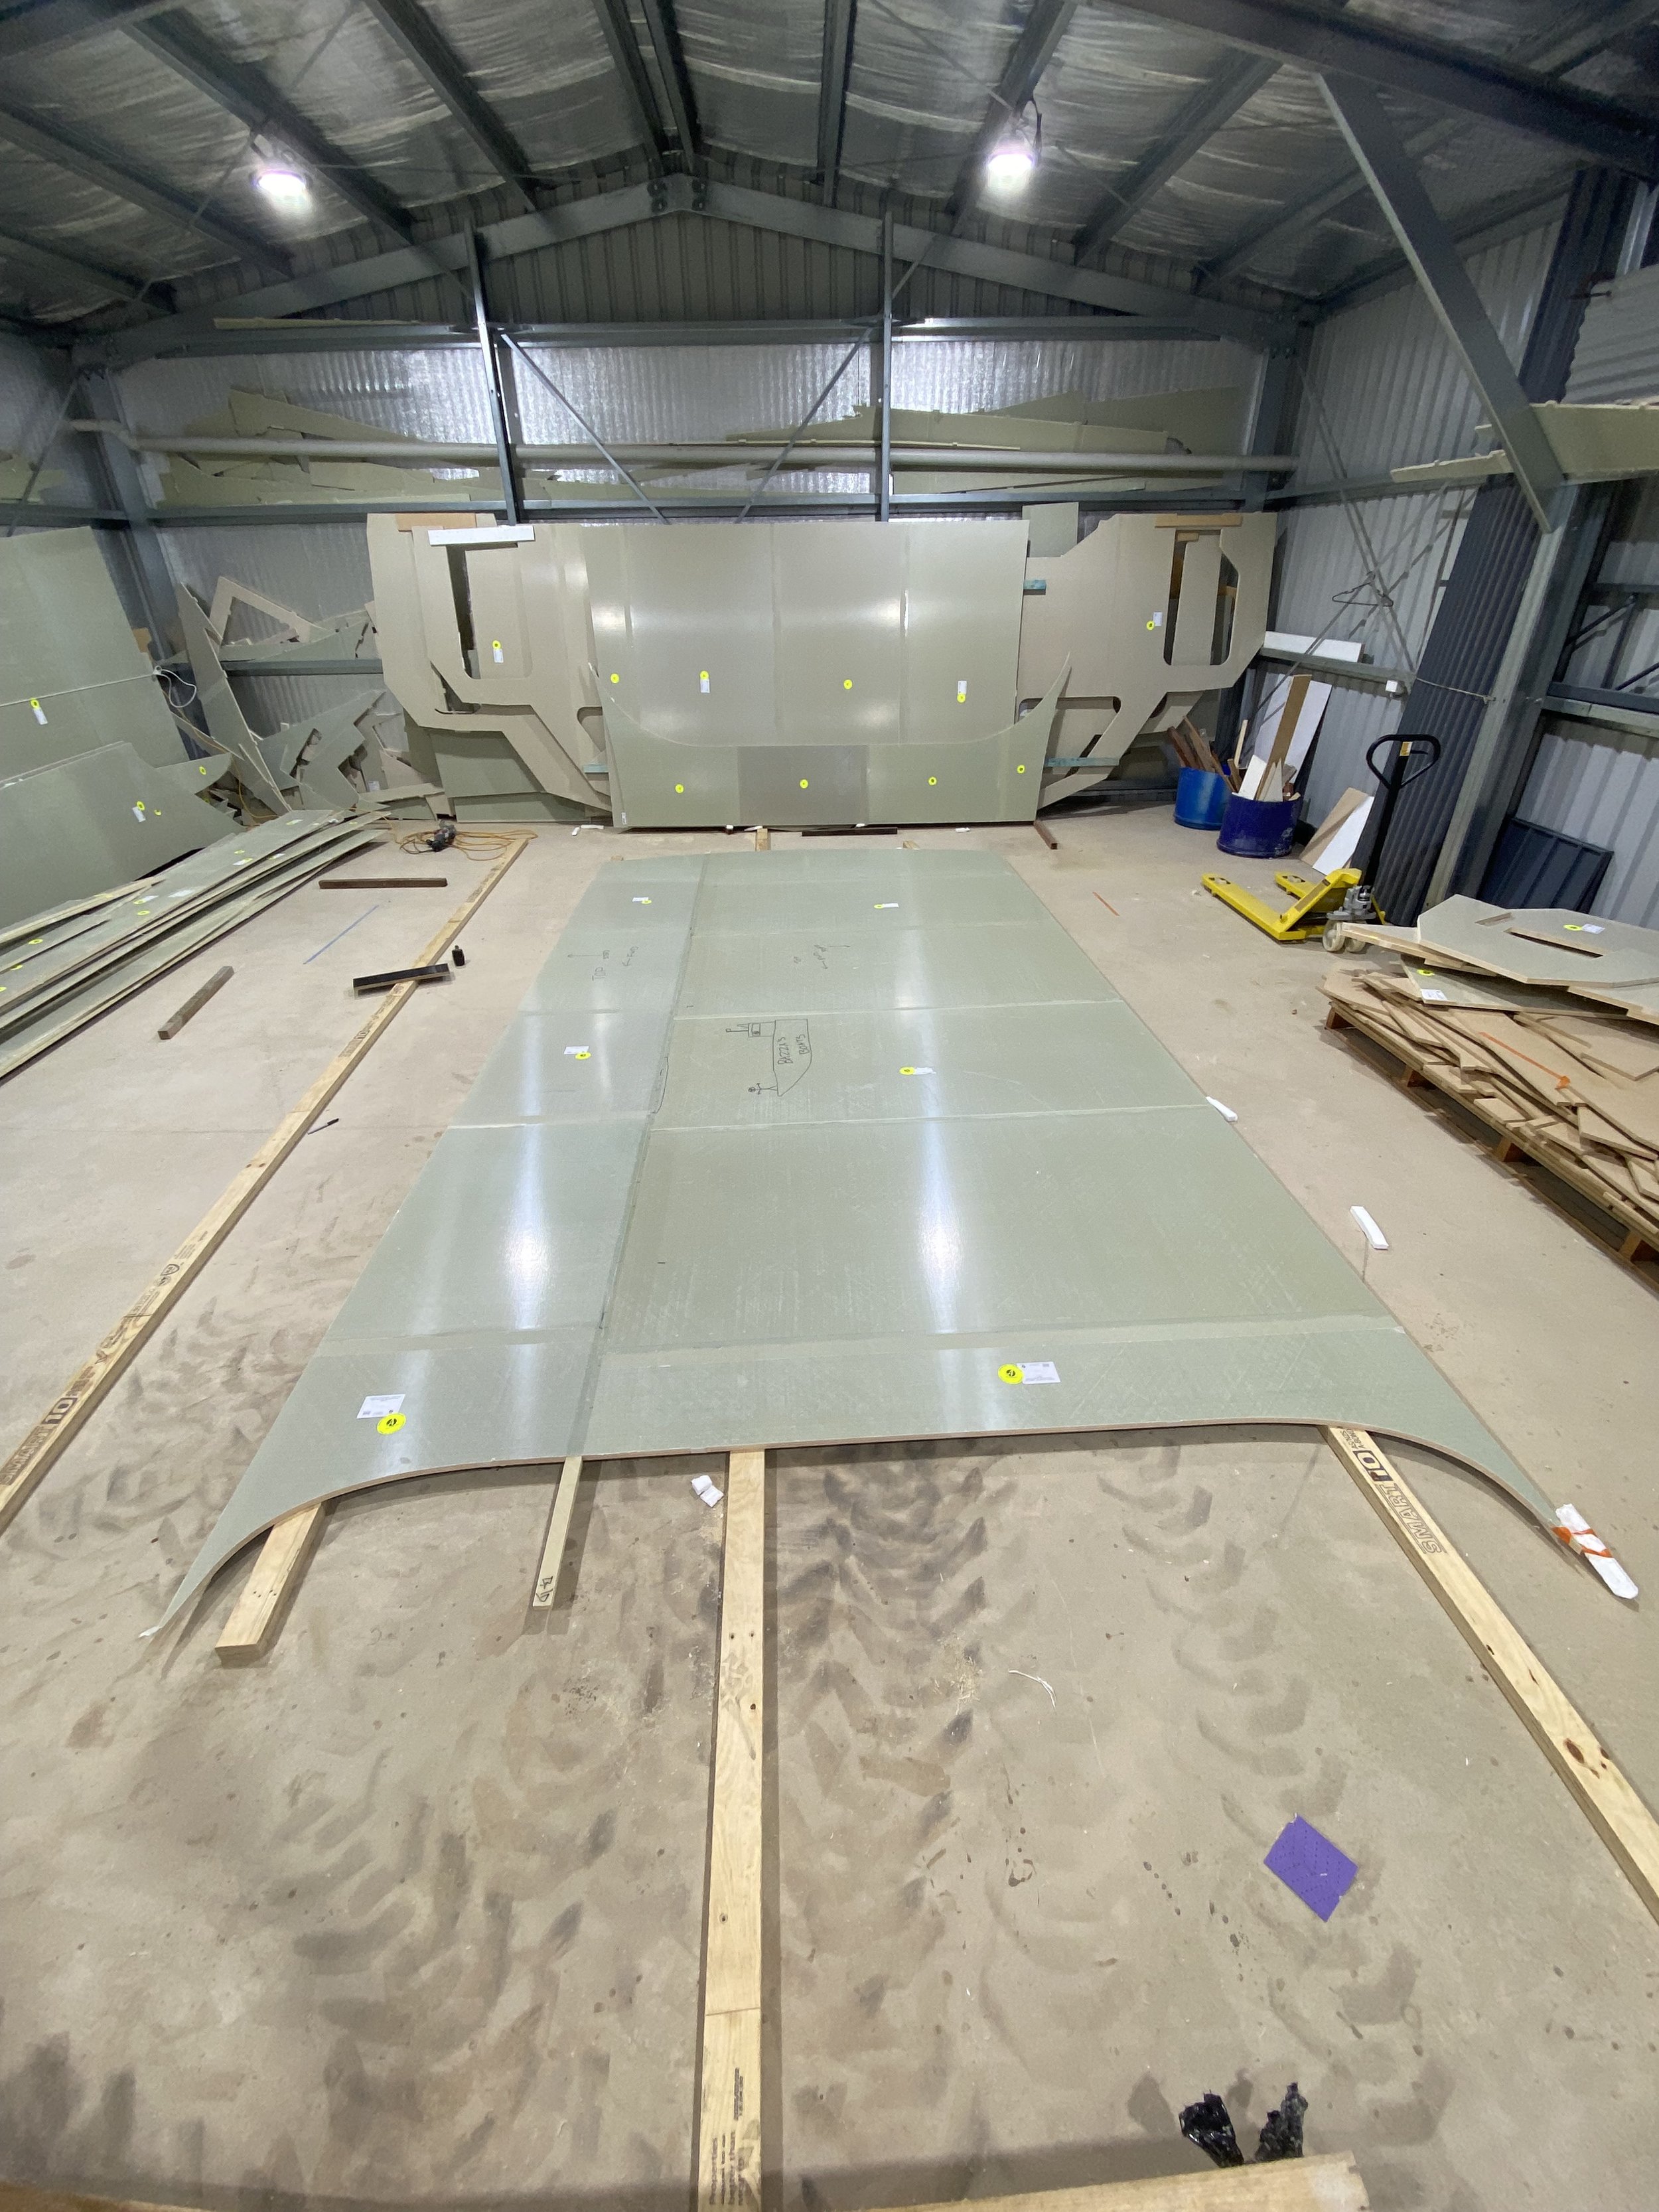
Now that all the panels are joined and DuFlex pieces cut out, we were able to build the frame to form our cabin top around.
But before we built the frame, we had to do our first ‘biscuit’ join. Because the cabin top roof is wider than the longest side of the panels, we needed to join the short sides together by inserting a strip of fibreglass to give both panels a strong surface to join to.
We had actually made these biscuits, ready to go, prior to receiving the kit …only to find that they were too thick to insert into the decored panels. After some head scratching and confusion, we figured out that although the foam is listed as 20mm thick, as the DuFlex panel is created and heat pressed, the foam is compressed by a few millimetres. So we started again, luckily with some leftover foam from a previous project.

Decored DuFlex panel on the left, and biscuit on the right
Cabin top roof joined together
The frame itself came together easy, with all pieces slotting together nicely. We spent a day making sure it was square, and again wondered if we should’ve built this in a bigger shed…

MDF frame assembled
The cabin top roof is a heavy beast! We needed a 3rd person to move it into position, and even that was a struggle.
The next mischief was trying to bend this roof into shape. We definitely should have kerfed it before building a frame and moving it into position. Kerfing is running a saw through the bottom skin of glass and roughly half the foam, but leaving the top skin intact. This allows the panel to bend into the shape needed.
But now that the panel was joined, in position and the frame taking the whole shed up, we couldn’t move it onto a flat area. I do not recommend kerfing overhead - what a headache!

Cabin top resting on frame, refusing to bend into shape

Overhead kerfing. Bad idea. Prevent at all costs!
The other sheets coming down the side were easier to manipulate into shape, and we could remove them to run the kerfs through.
To fix everything to the frame, we used off-cuts of MDF cut into squares as ‘washers’ to spread the pressure of the screw (and prevent damaging the surrounding glass). We dry fit all the panels, triple checked all the measurements, and then were ready to permanently join our cabin top!

Dry fitting panels, adjusting, and watching it come to life
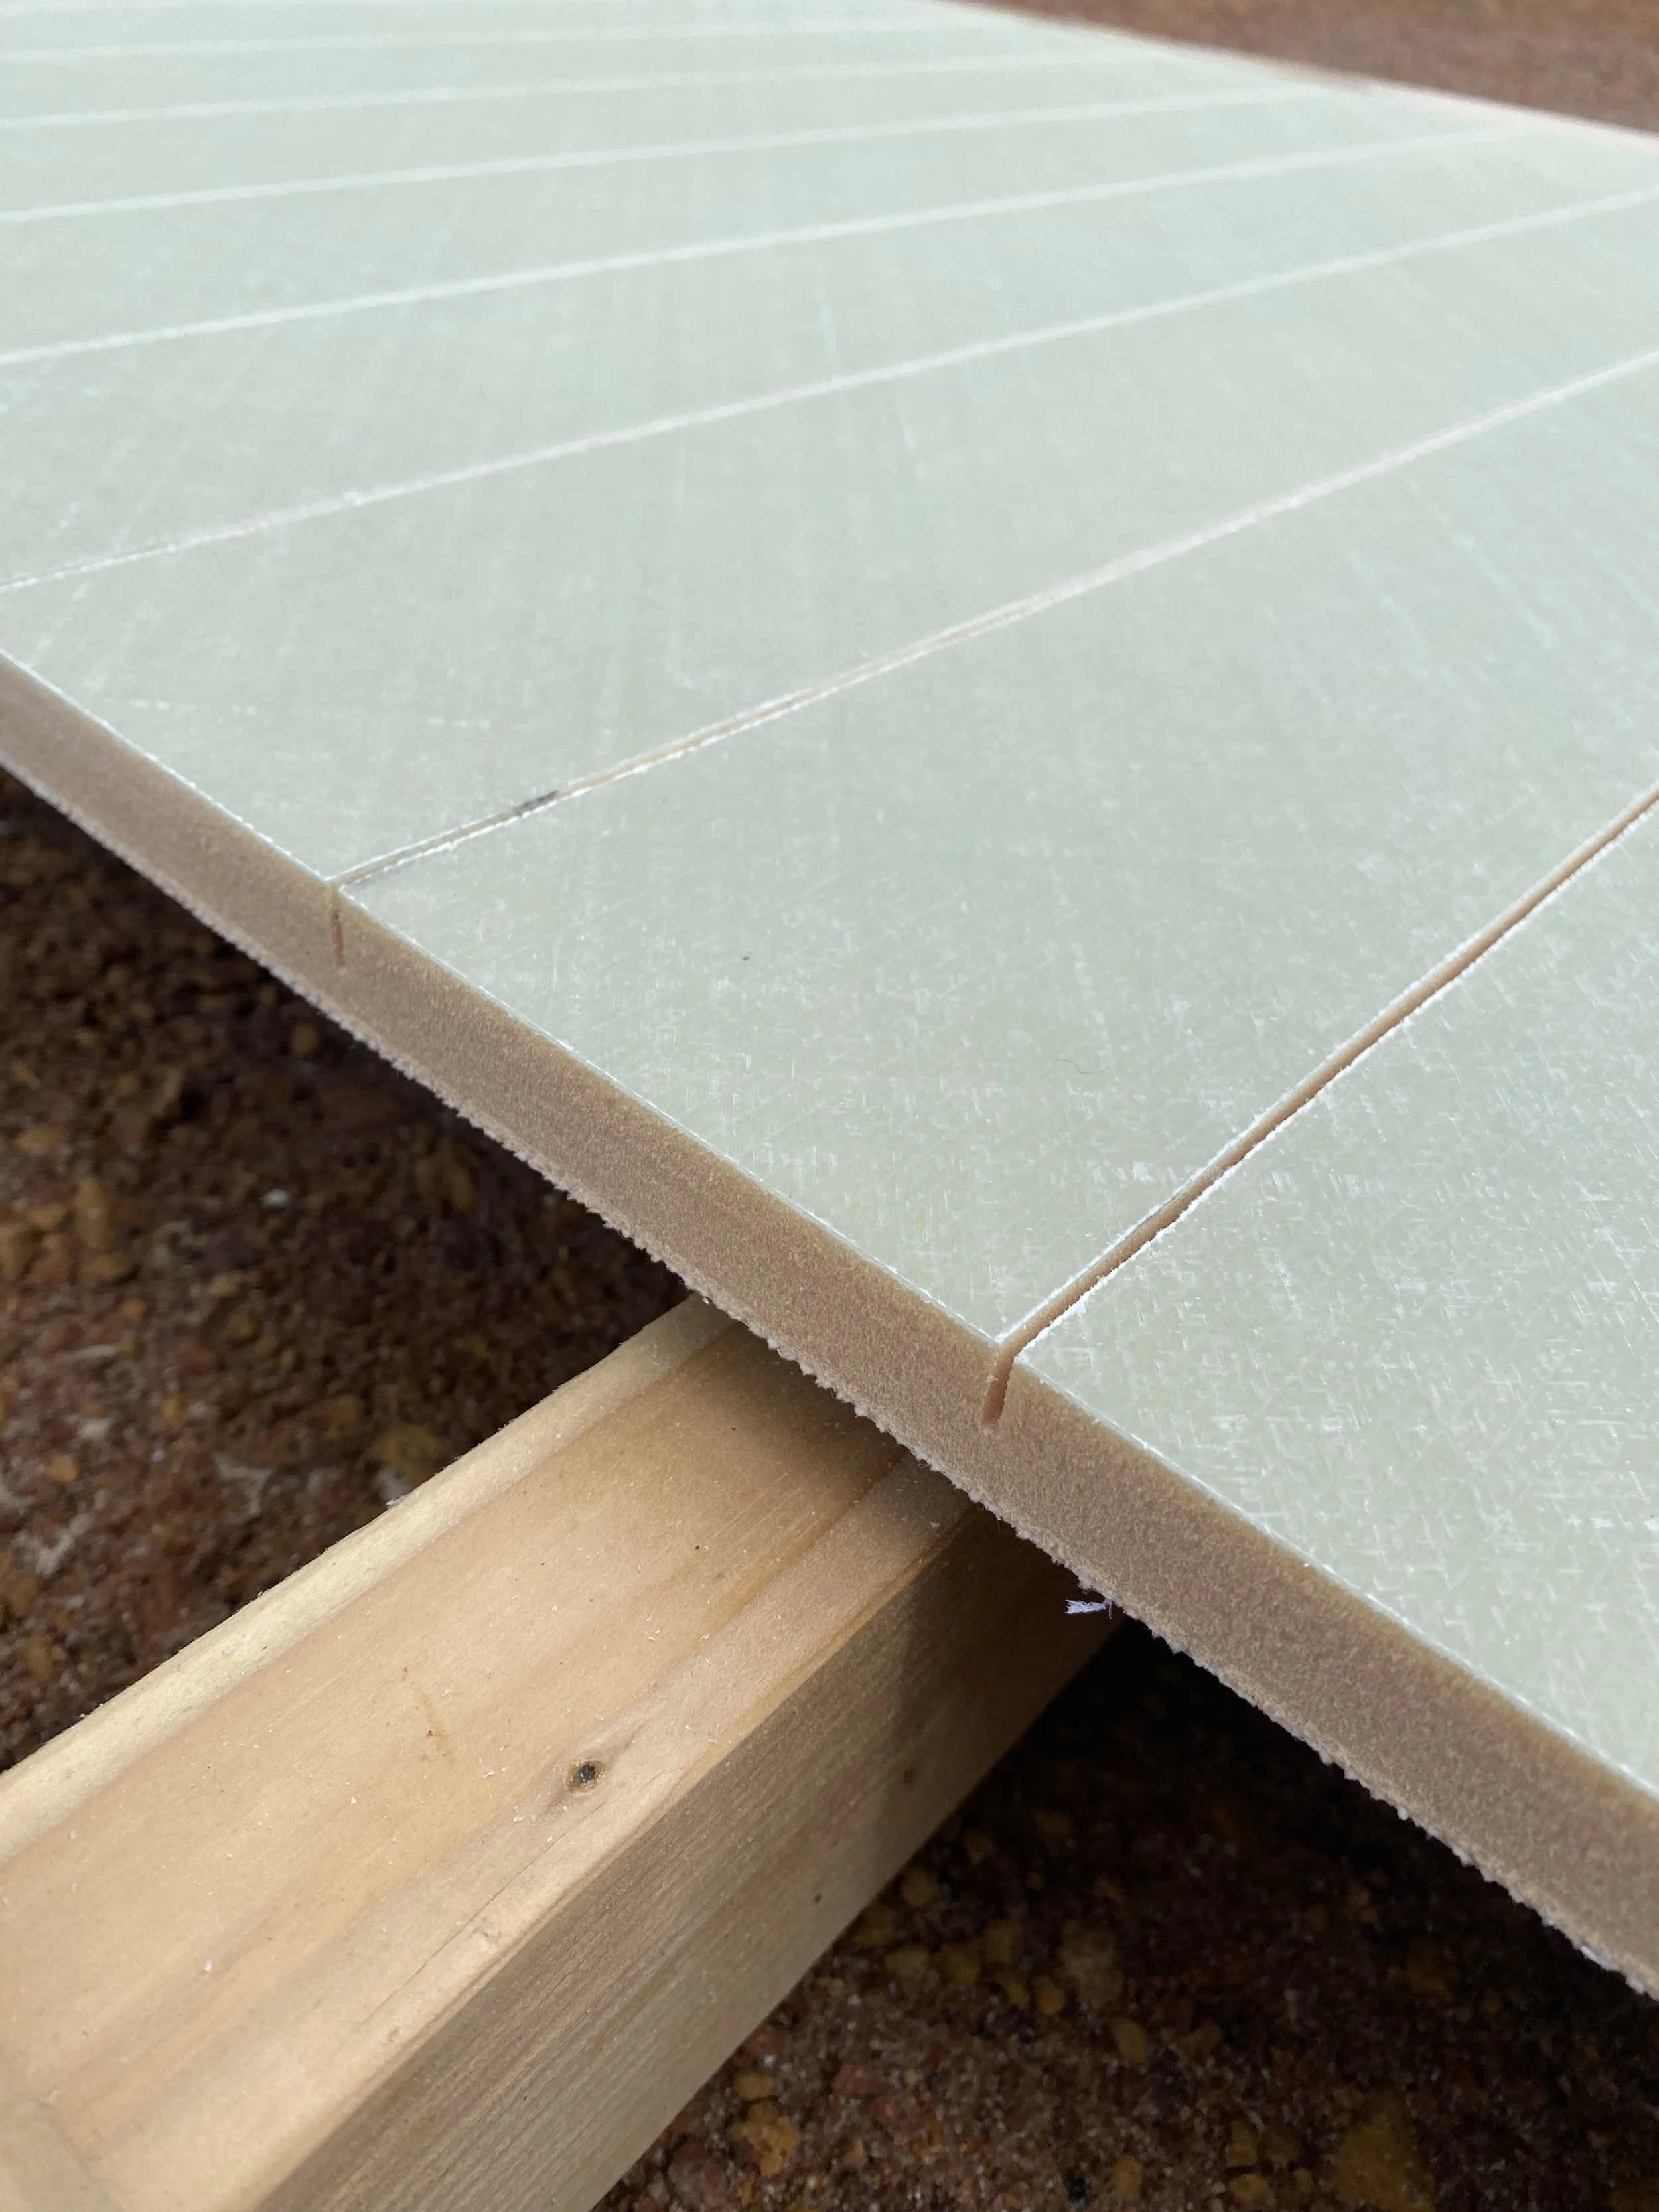
Side panel kerfing. If we were to do this again, we would have used a thicker saw blade - easier to fill with thickened epoxy.

Dry fit complete
As you can see above, the underside of the panels butt together, leaving a gap between the top edges as the sheet angle changes. Before we run the fibreglass tapes over this gap, we needed to fill it with our microspheres mix. This creates a smooth, gently curved surface for the glass to run over. We did this ‘wet on wet’ - meaning that we applied the 2 layers of fibreglass tapes over the microsphere mix while it was still tacky. This creates a chemical bond between the two, which is stronger than what would be a mechanical bond only (if we had of glassed over the set (dry) microsphere mix).

Gap between panel filled with the thickened epoxy (microsphere) mix

Fibreglass tapes applied
Repeated this for the 4 joins between the panels over the cabin top. You might be wondering what the plastic looking film is in the photo above - it is called ‘peel ply’. When the panels are produced, a layer of peel ply is applied before the epoxy sets. This absorbs any excess epoxy, and when removed, leaves the surface in a way which can be glassed straight onto (no sanding required - but you must glass onto it straight away!)
Throughout the build, you’ll see where we have removed strips when glassing is required. We aren’t removing the whole lot at once - because it will protect the panel, and we don’t want to do any more sanding than necessary!

All joined together! Peel ply covering the joins
The next step was to raise the cabin top off the frame so we could get to the underside to glass the kerfs and tape the joins from the inside.
Again, we spent hours contemplating the best way to lift this thing, with minimal frame inside. Every step we’ve taken in this build, we have had to think forward to how each step will affect the next. For this lift, we had to leave enough room underneath to;
a) roll both hulls
b) move all bulkheads into place
c) and position so it is very close to where it needs to be when lowered down onto the hulls
Considering the above, it wasn’t going to work to just lift the entire frame up - we needed the height through the back of the cabin top for the bulkheads. Plus, it would’ve been super heavy. So we reinforced two of the frames, and kept the fore/aft running supports, leaving us just enough room to scoot everything under! When we come to lower it onto the rest of the boat, we’ll have to cut a few slots out for the front and rear bulkhead, but the rest can stay in place until its in its final position.

Ready for the big lift. The fore LVL going through the side of the cabin top is aligned with where a future window will be. A chain block on each corner proved very helpful to get the cabin top level in the roof.

Lift off!!

Temporary bracing whilst we glass the underside.
Gently, we raised our precious creation off the ground. I really like the lines and angles in the cabin top, and have nicknamed it the ‘Starship Enterprise’ - cos this thing looks unreal and out of this world! Don’t worry, that’s not what we are going to officially name her…
We added a few more vertical LVLs to stabilise the flying cabin top and stop some of the swaying. From there, we basically did exactly the same as the top with the fibreglass tapes - cove with microspheres, then glass over the top.
Because we kerfed the roof to bend it into the right shape, we needed to strengthen those areas the saw had been through. This was our first taste of what working with the laminating resin would be like.
For large layups, we’ve been supplied with Kinetix epoxy resin. We were a bit nervous about doing such a large, flat overhead area - but were pretty impressed with how well the resin kept the cloth in place when wet. It has a long working time of 120 minutes, so we were able to take our time to make sure it was perfect.

A bit hard to see, but taping and glassing complete on the port side. Again, it’s only the peel ply hanging down - not dodgy glasswork!

Starting to look and feel like a big girl

Final resting place, for now. And look, we can see the floor again!!